OCIO (Open Color IO) Color Panels
The Panels
The OCIO color panel is a basic node builder for OCIO flows. Currently, u.m.p supports ACES 1.3, ACES 2.0, Blender 4.5, and the Blender 5.0 configs.
The Flow
Using OCIO Configs
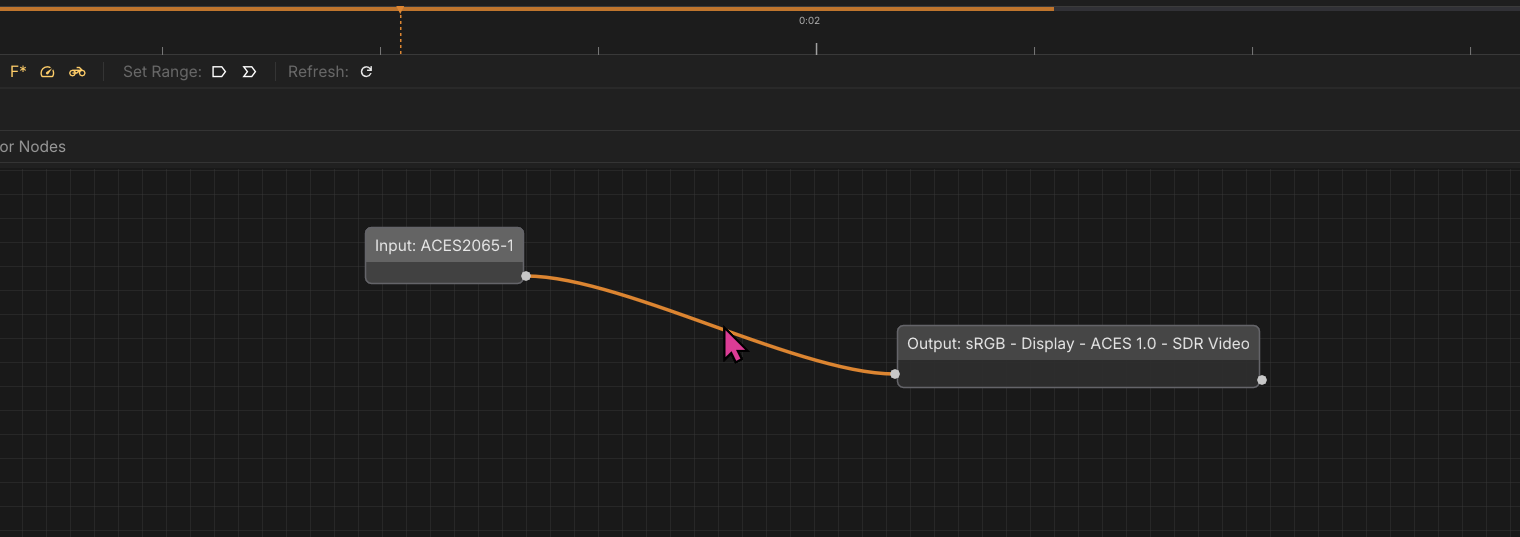
To build an OCIO node tree, you need at least an Input node and an Output node.

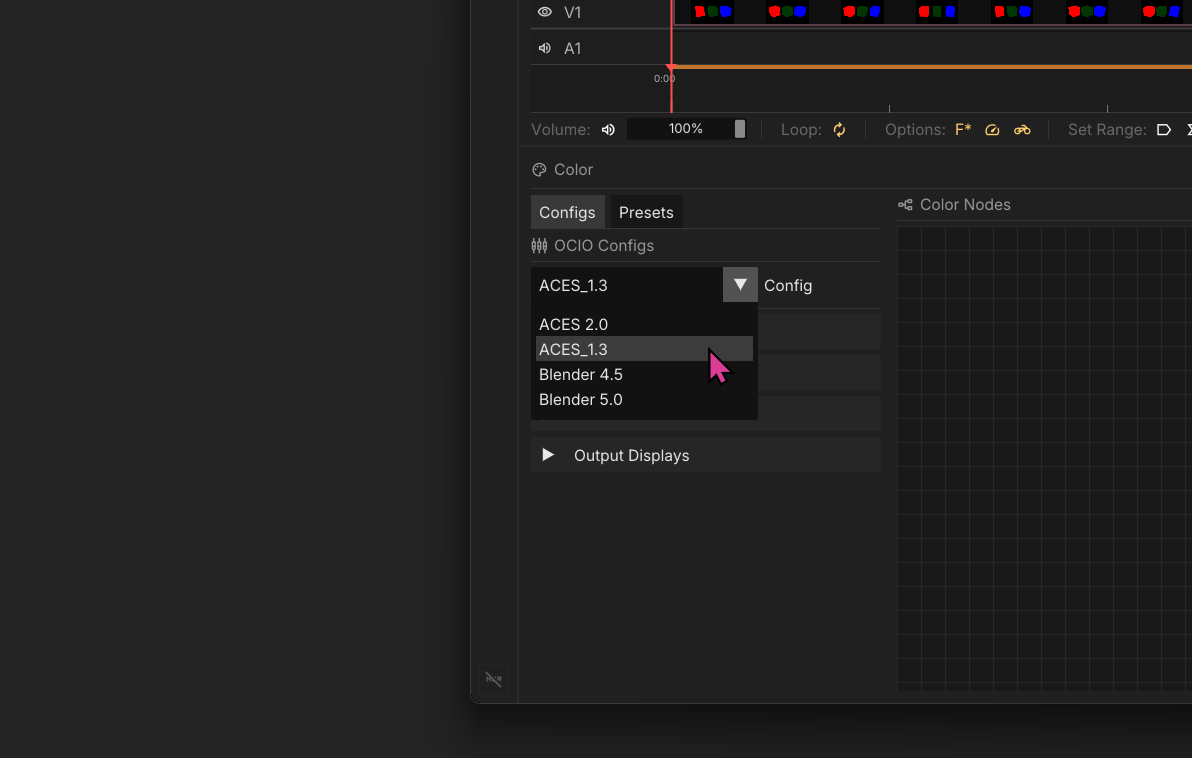
Select a Config
First, select a config that matches your DLC.
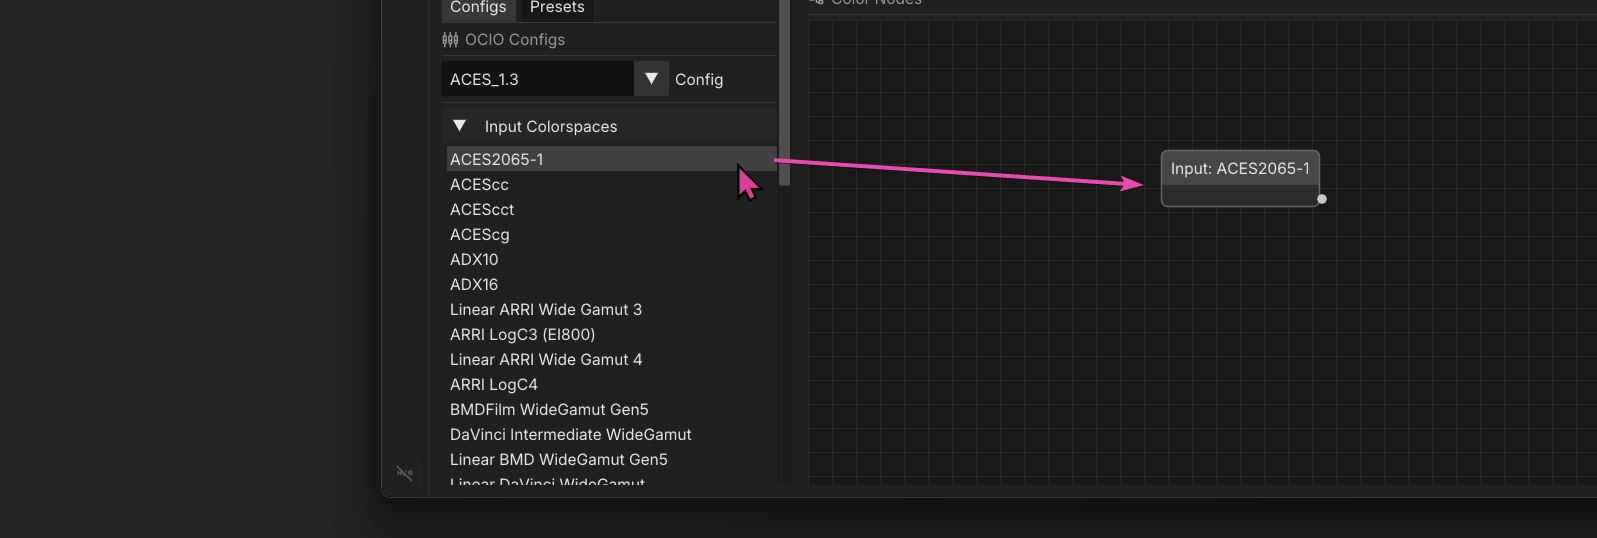
Select a Input Node
Then, select an Input Node and drag it into the Node Graph panel.
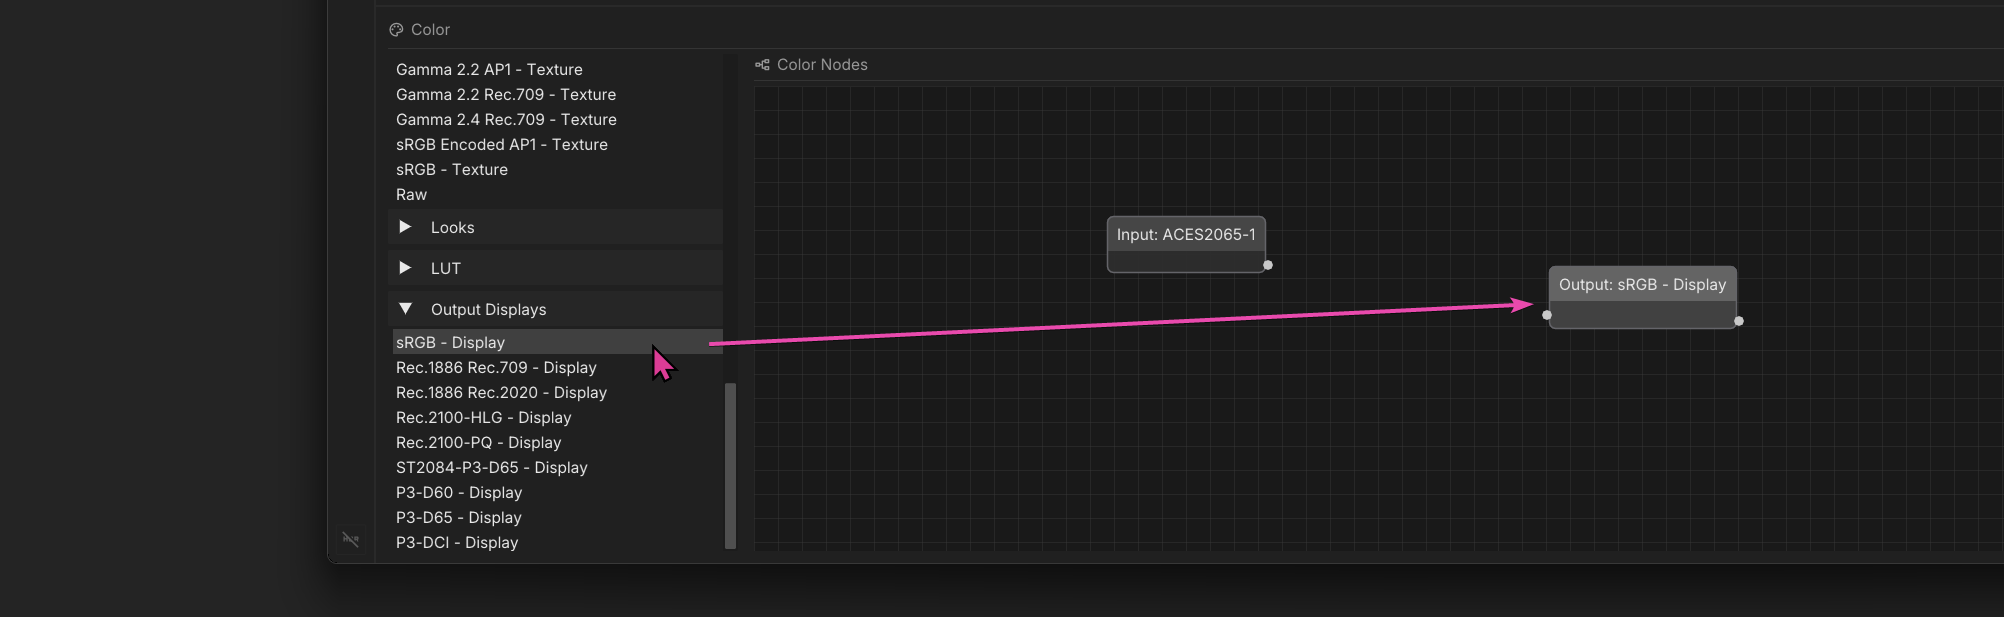
Select a Output Node
Select and output node and drag it into the graph.
Generate a Shader
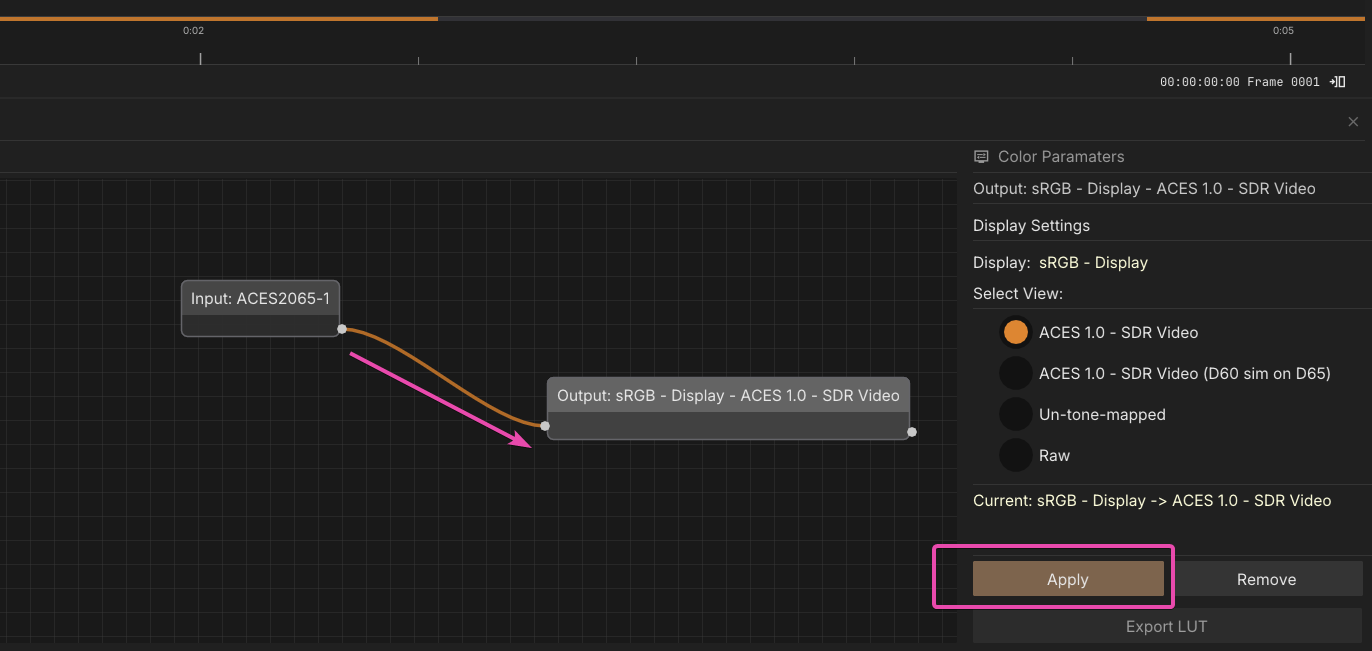
Hook them up. Click on the output node to load a settings panel on the right side of the color panel layout. Select a View if the Output node requires one. Then click the Apply button. You will see the shader applied in your Viewer. Click Remove to undo.
Node Management
You can click on any node or branch and use the keyboard’s X or Delete to remove it.
LUTS
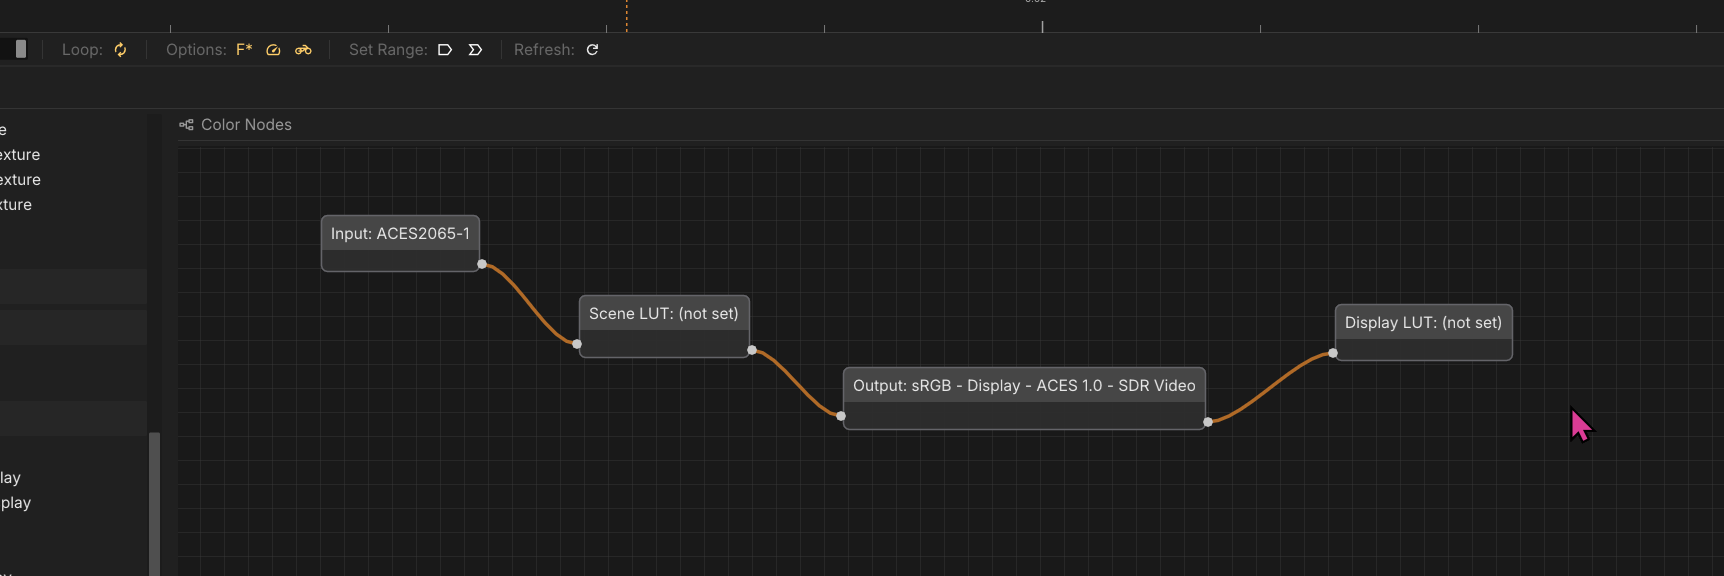
You can add custom LUTs to the chain. Scene LUTs go before the Output node, and Display LUTs go after. Click on the Select LUT File button to assign a .cube file.
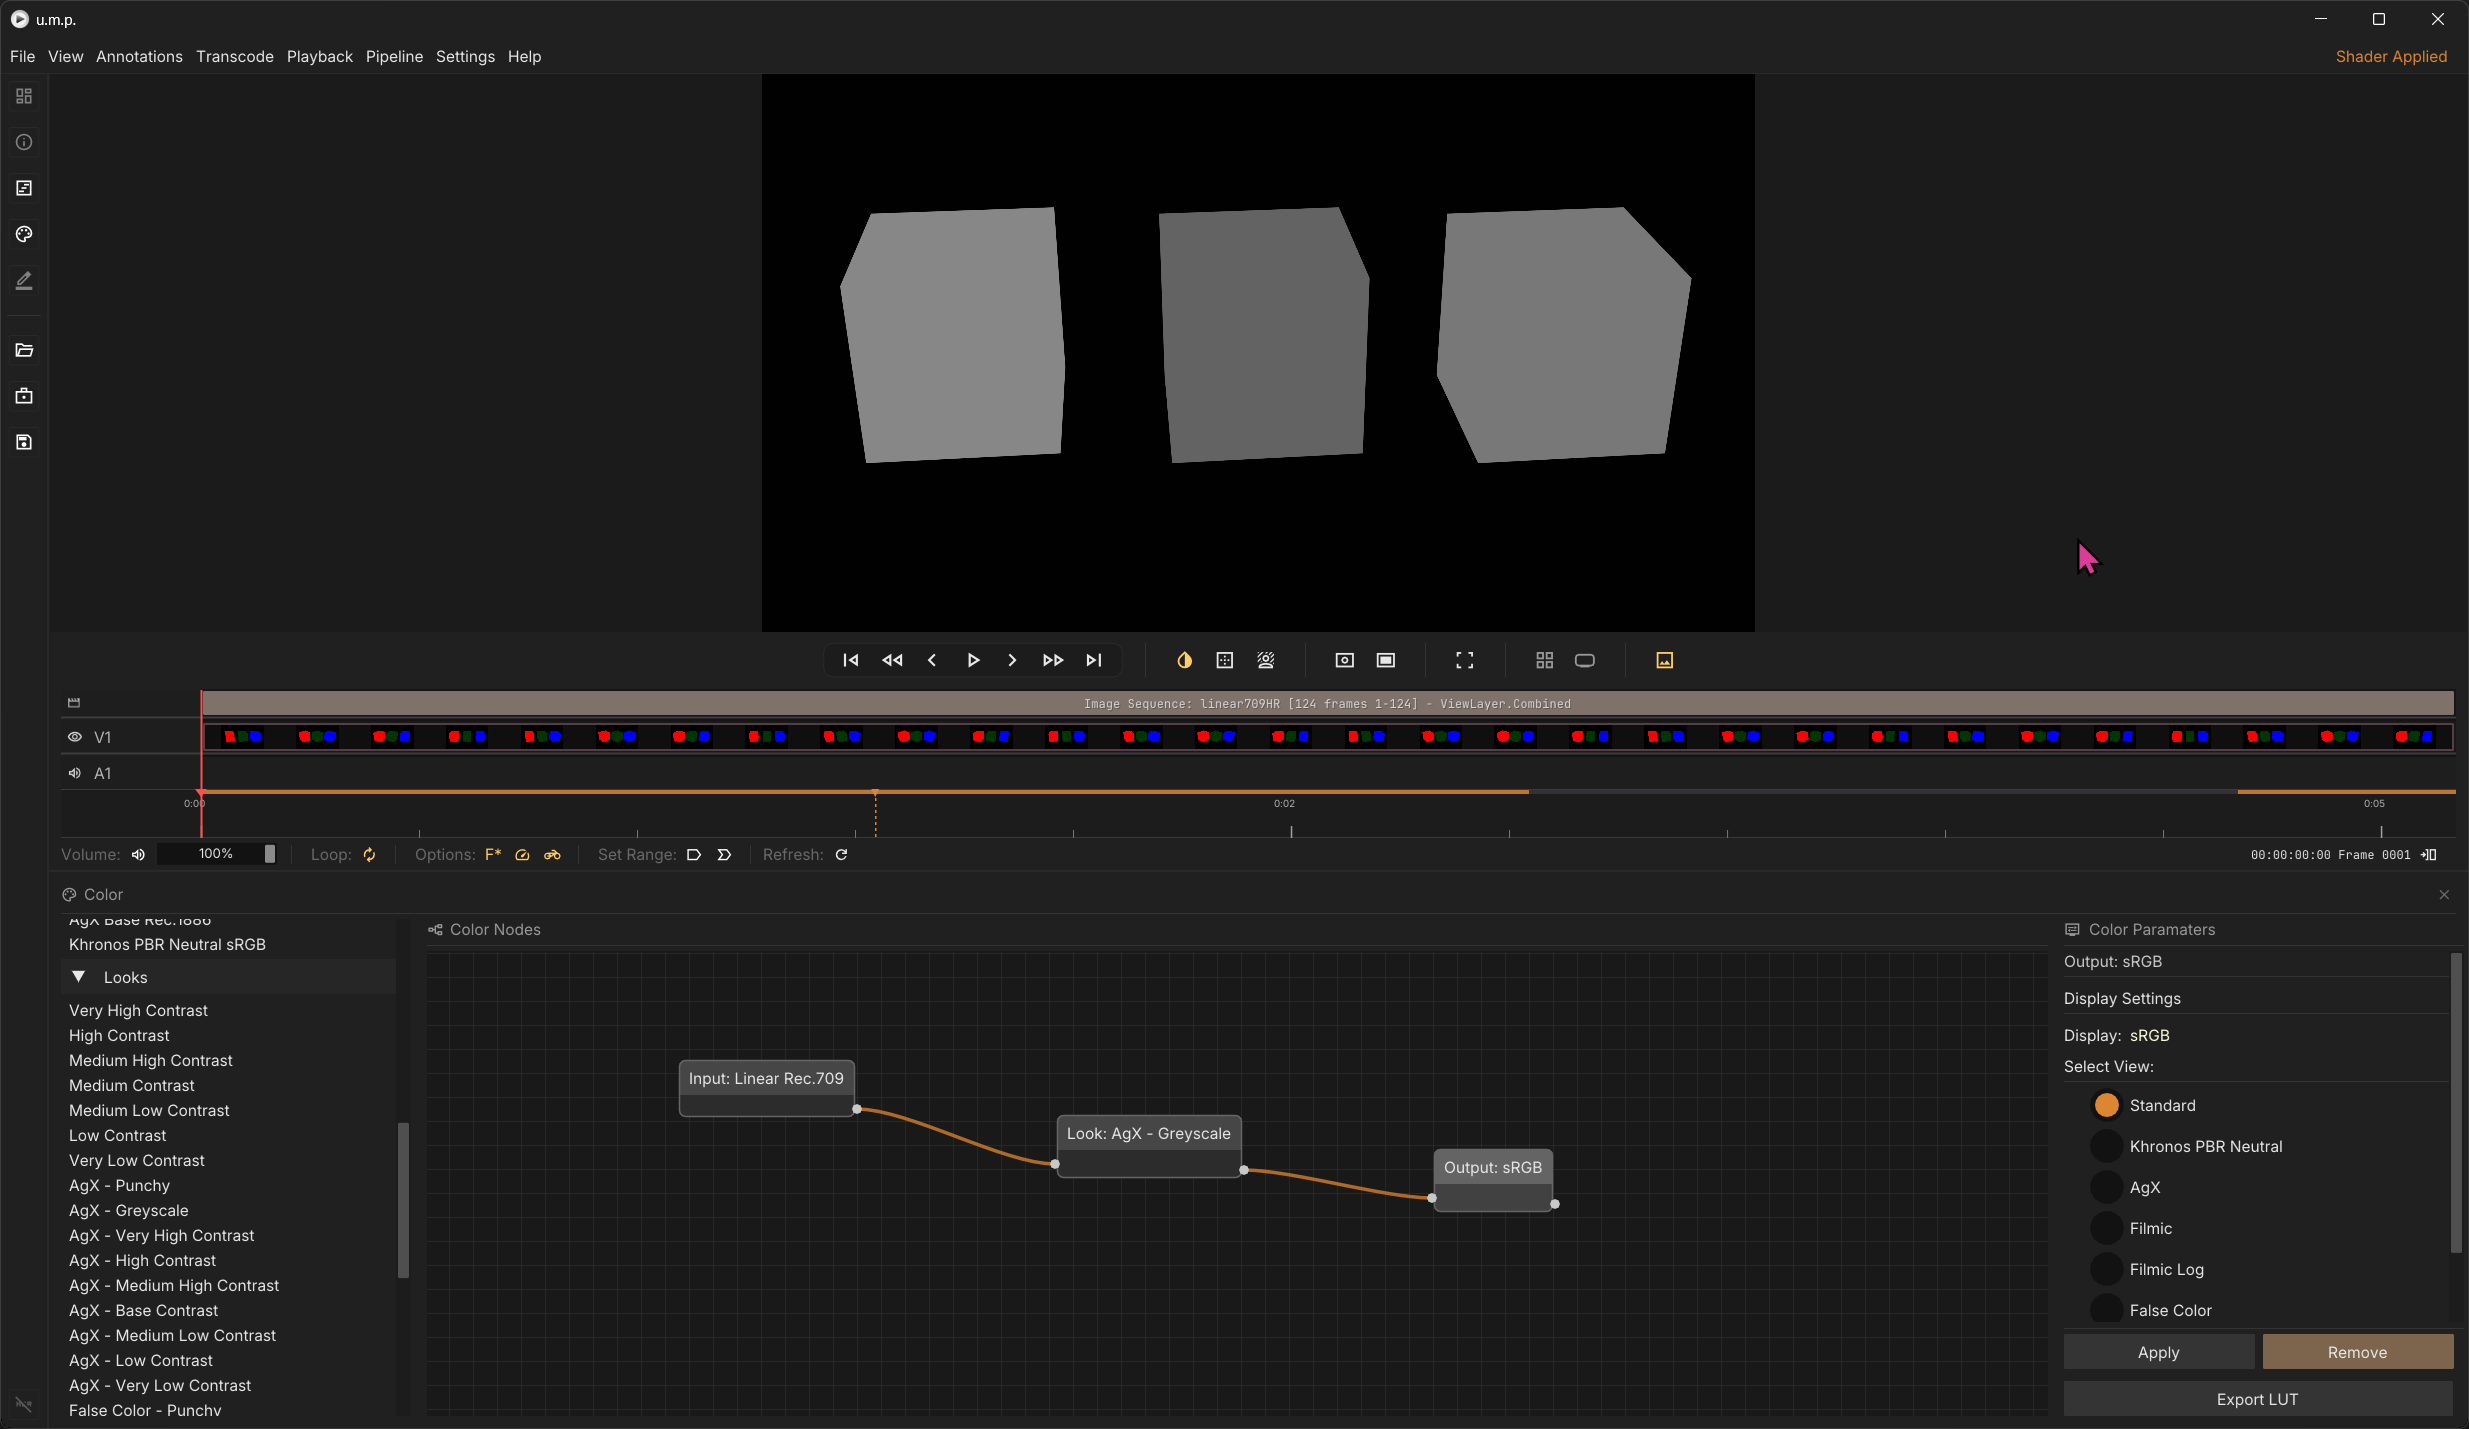
Looks
Looks belong in the chain between Input and Output. All Blender looks are supported (Contrast looks, AGX looks, Greyscale looks, Punchy, etc…)
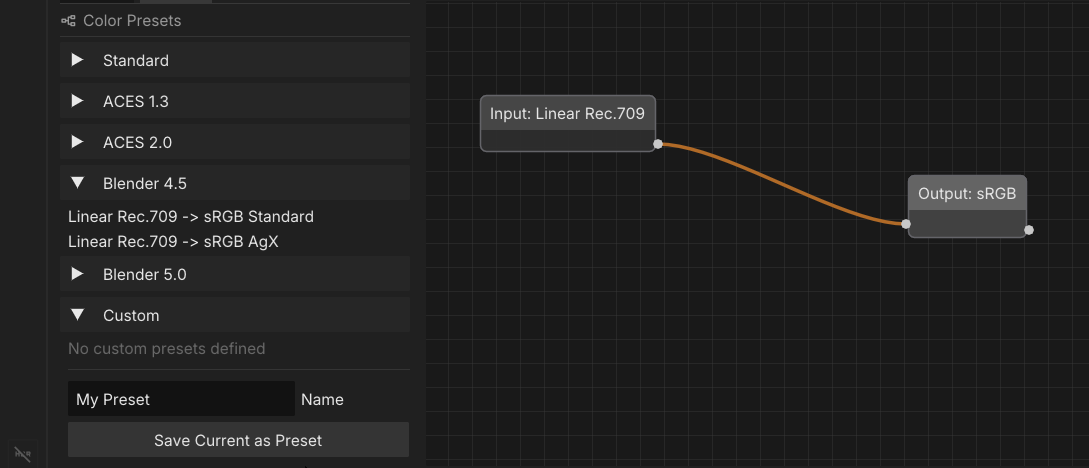
Presets
Presets are provided for each included config. Click on the preset to apply.

Custom Presets
Save your own presets.